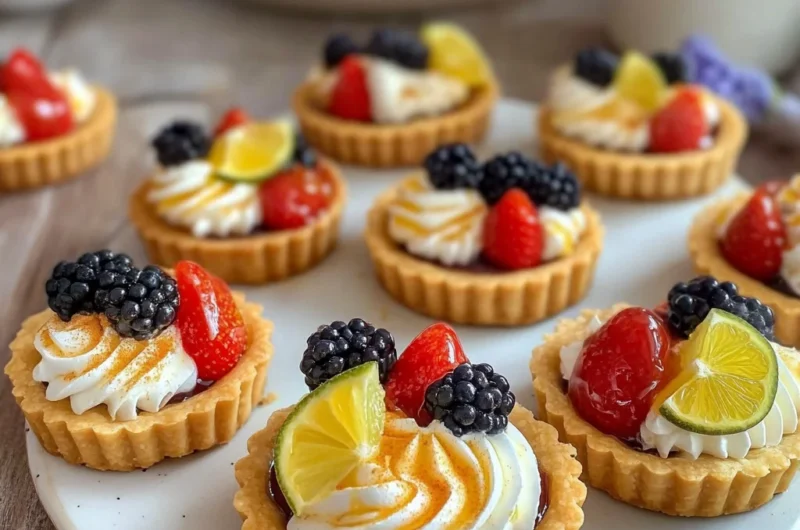
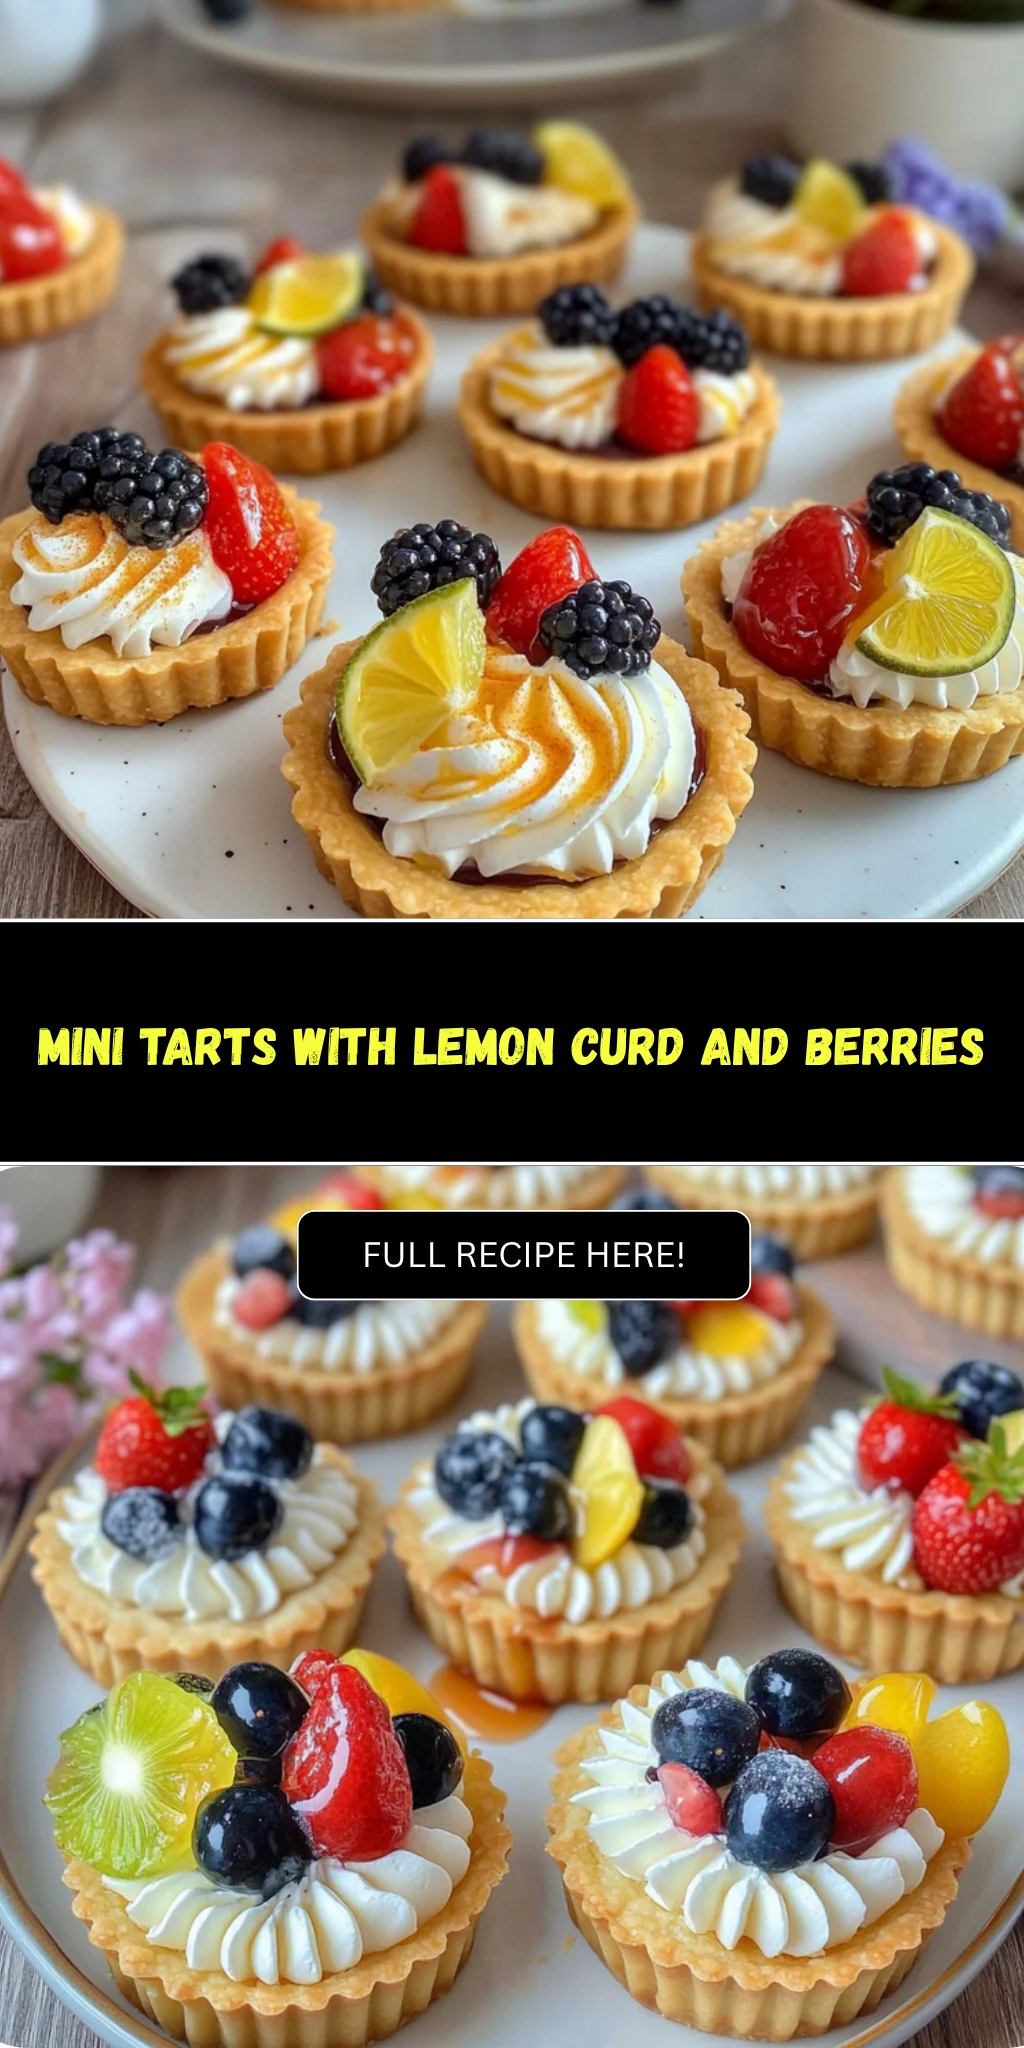
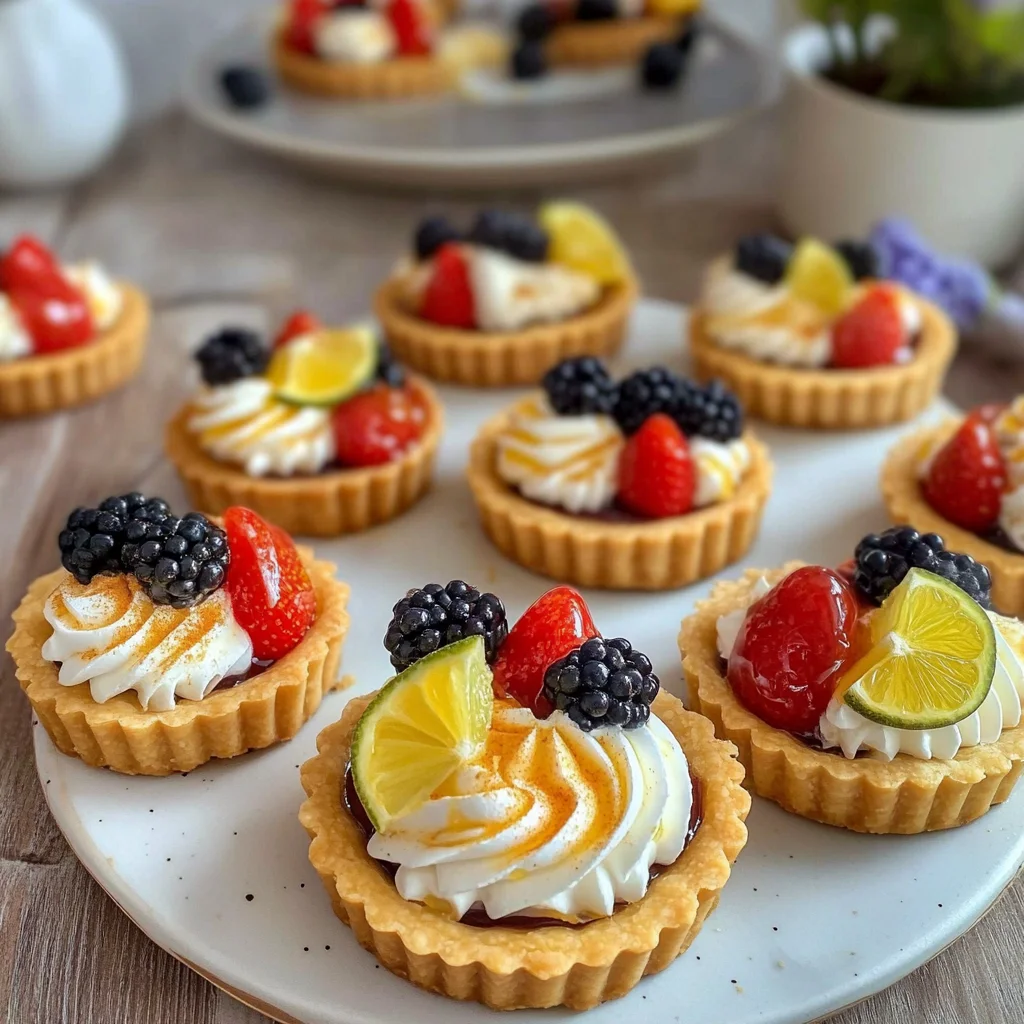
Imagine sinking your teeth into a flaky, golden mini tart, its buttery crust giving way to a delightful burst of flavor that dances on your palate. Whether it’s a sweet jam or a savory blend of cheese and herbs, each bite promises an unforgettable experience that leaves you craving more.
I still remember the first time I attempted to bake mini tarts for a family gathering; the kitchen filled with the irresistible aroma of baked goodness, and laughter echoed as my loved ones gathered around, eager to taste my creations. Perfect for parties, picnics, or cozy nights in, these versatile delights are sure to impress anyone who takes a seat at your table, making every occasion just a bit more special.
Why Will You Keep Making mini tarts?
Deliciously versatile, these mini tarts can be filled with sweet fruits or savory delights, making them perfect for any gathering. Quick to prepare, they require just 30 minutes of prep and 20 minutes of baking, fitting seamlessly into your busy schedule. Crowd-pleasers, their adorable size and beautiful presentation make them a hit at parties and potlucks. Plus, with simple ingredients like buttery pastry crust and creamy fillings, you can easily customize each tart to suit your taste or occasion!
mini tarts Ingredients
For the Pastry Crust
- 1 cup all-purpose flour – This forms the base of your mini tarts, providing structure and a light texture.
- 1/2 cup unsalted butter (cold and cubed) – Cold butter creates a flaky crust; make sure it’s straight from the fridge!
- 1/4 cup granulated sugar – Adds a touch of sweetness to balance the flavors in your mini tarts.
- 1 large egg yolk – This enriches the dough, giving it a beautiful color and richness.
- 2 tablespoons cold water – Helps bring the dough together without warming the butter too much.
For the Filling Options
- 1 cup fresh fruit (e.g., berries or sliced apples) – Choose seasonal fruits for a burst of flavor and natural sweetness in your mini tarts.
- 1/2 cup cream cheese (softened) – This creamy filling pairs perfectly with sweet or savory options for added richness.
- 1/4 cup powdered sugar (for sweet filling) – A sprinkle of powdered sugar makes your sweet fillings irresistibly smooth and delightful.
- 1 tablespoon vanilla extract – Enhances the flavor profile of your sweet fillings, making them aromatic and delicious.
- 1 cup savory filling (e.g., cheese and herbs) – Offers endless possibilities for flavor combinations in your mini tarts, perfect for any occasion!
How to Make mini tarts
1. Combine flour and sugar in a mixing bowl, creating a sweet foundation for your pastry. Add the cold, cubed butter, and mix until crumbly—this should take just a few minutes.
2. Add the large egg yolk and the cold water to the mixture, stirring gently until the dough comes together. Wrap it in plastic wrap and chill in the refrigerator for 30 minutes to firm up.
3. Preheat your oven to 350°F (175°C). Roll out the chilled dough on a lightly floured surface and cut out circles that fit your tartlet pan perfectly.
4. Press the dough circles into the tartlet pan, ensuring they fit snugly. Prick the bottoms with a fork to prevent bubbling, then bake for about 15 minutes or until golden brown.
For the Filling:
5. Mix together softened cream cheese, powdered sugar, and vanilla extract until smooth for a delightful sweet filling. This blend will be creamy and luscious!
6. Combine cheese and herbs in a bowl for a savory filling that’s bursting with flavor. This mixture is both aromatic and satisfying.
7. Fill each baked tart shell with your chosen filling, whether it’s sweet or savory, ensuring an even distribution for delightful bites.
8. Top your sweet tarts with fresh fruit like berries or sliced apples for added color and freshness; use additional herbs for savory tarts to enhance their taste.
Optional: Garnish with a dusting of powdered sugar for sweet tarts or extra herbs for savory ones.
Exact quantities are listed in the recipe card below.
Tips for the Best mini tarts
- Chill the Dough: Refrigerate the dough for at least 30 minutes to ensure a flaky crust and prevent shrinkage during baking.
- Use Cold Ingredients: Ensure your butter is cold and cubed before mixing. This helps create that desired crumbly texture in your pastry crust.
- Don’t Overmix: When combining the flour, sugar, and butter, mix just until crumbly. Overmixing can lead to tough mini tarts instead of tender ones.
- Prick the Bottoms: Always prick the tart shells with a fork before baking to prevent bubbling and ensure even cooking.
- Filling Balance: When filling your mini tarts, don’t overfill. A heaping spoonful can cause overflow during baking, leading to messy results.
- Experiment with Flavors: Don’t hesitate to mix and match fillings! Try different fruits or cheese combinations for unique mini tarts that will delight everyone.
How to Store and Freeze mini tarts
- Room Temperature: Mini tarts can be kept at room temperature for up to 2 days. Store them in an airtight container to prevent them from drying out.
- Fridge: If your mini tarts are filled with cream cheese or fresh fruit, store them in the refrigerator for up to 3 days. Cover them loosely with plastic wrap to avoid moisture accumulation.
- Freezer: For longer storage, freeze mini tarts for up to 2 months. Wrap each tart individually in plastic wrap, then place them in a freezer-safe bag or container.
- Reheating: To enjoy your frozen mini tarts, thaw them overnight in the fridge. Reheat in a preheated oven at 350°F (175°C) for about 10 minutes until warm.
mini tarts Your Way
Feel free to let your creativity shine as you explore these delightful twists and swaps!
- Gluten-Free: Substitute all-purpose flour with a gluten-free blend for a deliciously inclusive treat. The texture may vary, but the flavors will still shine through. Enjoy crafting mini tarts that everyone can savor!
- Vegan: Replace butter with coconut oil and the egg yolk with a flax egg. This gives you a rich, buttery flavor while keeping it plant-based. You’ll love how these mini tarts still come out flaky and satisfying!
- Spicy Kick: Add a pinch of cayenne or chili powder to the pastry crust for a zesty surprise. This little enhancement brings warmth and excitement to your savory fillings, making each bite unforgettable.
- Herb Infusion: Mix fresh herbs like rosemary or thyme into the dough for an aromatic twist. These fragrant notes pair beautifully with savory fillings, creating a mini tart that smells as heavenly as it tastes.
- Nutty Crunch: Incorporate finely chopped nuts like almonds or pecans into the crust for added texture and flavor. It creates a delightful crunch that complements sweet or savory options beautifully.
- Sweet Surprise: Swap granulated sugar for brown sugar in the crust for deeper caramel notes. This small change adds richness and complexity, particularly with fruit-filled variations.
- Fruit Zest: Stir in some citrus zest (like lemon or orange) to brighten up your crust’s flavor profile. This twist elevates sweet fillings by adding a refreshing contrast that invigorates every bite.
Make Ahead Options

These delightful mini tarts are perfect for meal prep, allowing you to savor their deliciousness whenever the craving strikes. You can prepare the pastry crust ahead of time by combining 1 cup of all-purpose flour, 1/4 cup of granulated sugar, and cold cubed butter until crumbly, then mixing in 1 large egg yolk and 2 tablespoons of cold water. After refrigerating the dough for 30 minutes, you can roll it out and bake the tart shells—this step can be done up to 3 days in advance. For the fillings, sweet options like cream cheese mixed with 1/4 cup powdered sugar and 1 tablespoon vanilla extract can be prepped a day ahead, while savory mixes of cheese and herbs can also be made in advance. To maintain quality, store the tart shells and fillings separately in airtight containers in the fridge. When you’re ready to serve, simply fill the baked tart shells with your chosen filling and top them as desired for a fresh, delightful treat!
mini tarts Recipe FAQs
What type of flour is best for the pastry crust?
All-purpose flour is ideal for this mini tarts recipe. It provides a perfect balance of structure and tenderness. For a gluten-free option, you can substitute it with a 1: 1 gluten-free flour blend, but note that this may slightly alter the texture.
How should I store leftover mini tarts?
To keep your mini tarts fresh, store them in an airtight container in the refrigerator. They’ll stay tasty for up to 3 days! If you have filled savory tarts, it’s best to consume them within 2 days to maintain the best flavor and texture.
Can I freeze mini tarts for later use?
Absolutely! You can freeze the unfilled baked tart shells. Just let them cool completely, then wrap them tightly in plastic wrap and place them in a freezer bag. They can be frozen for up to 2 months. When you’re ready to use them, simply thaw and fill with your desired filling!
What if my pastry dough is too crumbly?
If your pastry dough seems too crumbly and won’t hold together, try adding an extra teaspoon of cold water at a time until it comes together. Make sure your butter is very cold when mixing; this helps achieve that buttery flakiness that makes these mini tarts so delicious!
How many servings does this recipe yield?
This recipe makes about 4 servings of delightful mini tarts. Each serving contains approximately 150 calories, making them a perfect treat or appetizer without being overly indulgent.
Can I make sweet or savory fillings ahead of time?
Yes! You can prepare both sweet and savory fillings ahead of time. Store sweet filling (cream cheese mixture) in the fridge for up to 3 days and savory filling (cheese and herbs) for about 2 days. Just make sure to fill your tart shells just before serving for the best taste and texture!
Mini Tarts
Ingredients
Method
- In a mixing bowl, combine flour and sugar. Add cold butter and mix until crumbly.
- Add egg yolk and cold water, mixing until the dough forms. Wrap in plastic and refrigerate for 30 minutes.
- Preheat the oven to 350°F (175°C). Roll out the dough and cut into circles to fit the tartlet pan.
- Press the dough into the tartlet pan and prick the bottoms with a fork. Bake for 15 minutes or until golden.
- For sweet tarts, mix cream cheese, powdered sugar, and vanilla extract until smooth.
- For savory tarts, mix cheese and herbs together.
- Fill the baked tart shells with your desired filling.
- Top with fresh fruit for sweet tarts or additional herbs for savory tarts.